How to prepare artwork for ‘weeding’
We often see artwork on windows, walls, vehicles and other surfaces where the text and images are ‘cut out’ before being applied to the surface, leaving the background clear.
Below are two scenarios where both artwork files were printed on white vinyl. Each file was prepared differently, which resulted in very different end results.
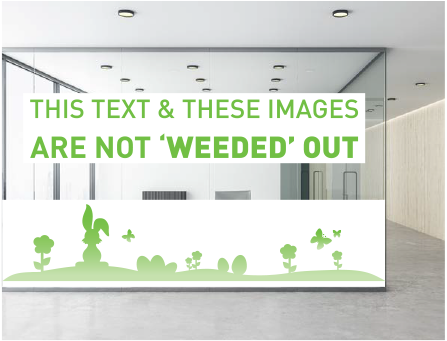
The above was produced from an artwork file prepared with a custom knife line.
This window decal example demonstrates artwork printed and cut from a file that was prepared correctly for the ‘weeding’ process.
The unwanted parts around the text and images can be removed and the end product has a clear background, allowing visibility through the glass.
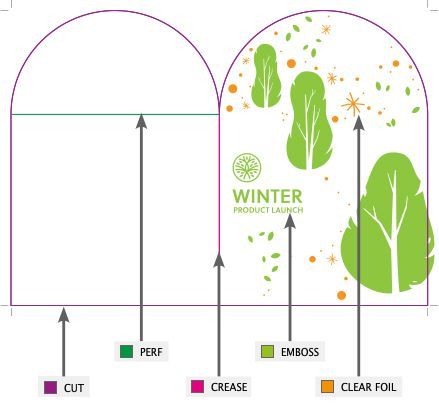
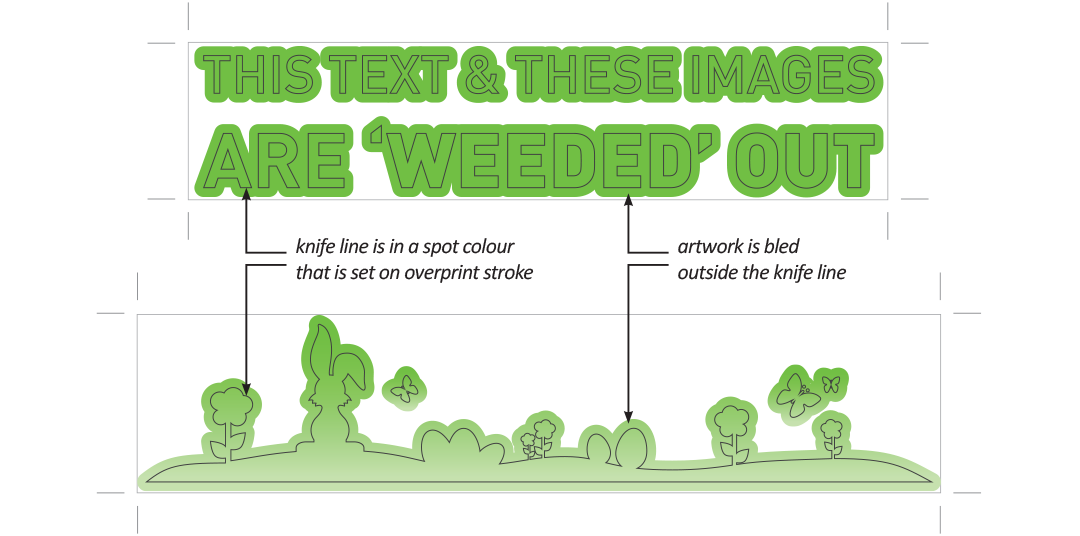
This file was prepared with:
- a knife line in the artwork for production to cut around the letters and images
- additional bleed around the artwork that is removed together with the non-printed areas.
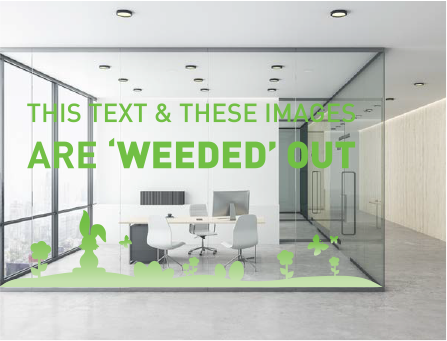
The above was produced from an artwork file prepared with basic trim marks only.
This window decal example shows artwork printed and cut from a file that was prepared for a basic ‘square cut’.
The artwork is cut to the trim-marks and all the unprinted areas within the trim-marks are retained in the end product. The entire sheet is applied to the window with the unprinted vinyl blocking off vision through the glass.
This file was prepared with:
- basic corner trim marks exported with the artwork.
Setting up Artwork
Production and Installation
During printing and production, our cutting machine is guided by the knife line in the file and will cut around the letters and images.
To prepare for the window application, the installation staff will manually ‘weed’ out all the negative areas by carefully picking around the cut line to peel away the unwanted parts.
Contact Bright Print Group for specific information regarding your job. Our prepress staff can help guide you to set up your artwork files so they are print-ready!